Today I started with removing the masking tape and paper from the chassis.
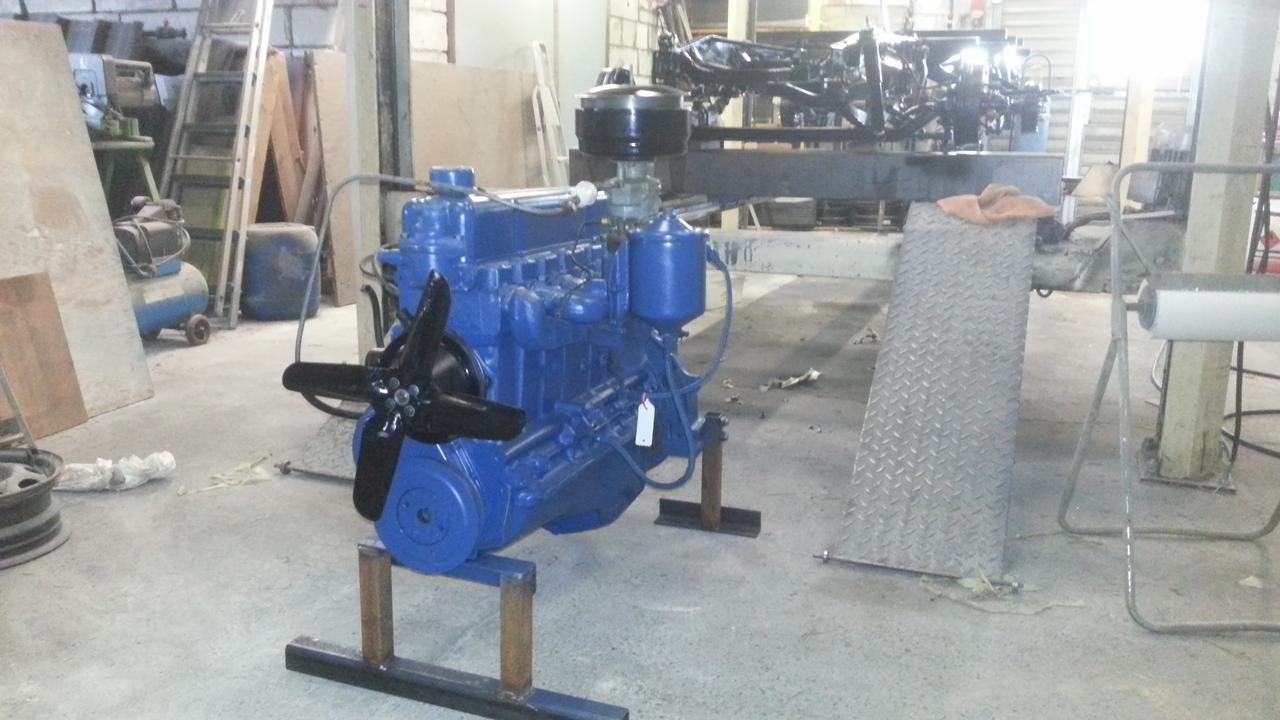
Then I put the engine that came during last week, in front of the chassis.
And then I started with applying filler to the truck bed panels.
Some sanding and more filler went on.
And then more sanding followed and at last I sanded everything ones more with 180 grid paper. These parts are now ready to receive a coat of primer and some spray filler.
Next on the list is the cabin. The outside was sanded with 180 grid paper and while sanding the roof a few dents were exposed. I filled them with some filler and then sanded them down.
I then sanded the complete interior of the cabin and removed all the dust as good as possible in this stage.
At the end of the day the cabin is also ready to receive some primer and filler.
Monday, March 20, 2017
Saturday, March 18, 2017
Chassis work
I started today with removing the cabin from the frame to the cart I made for it.
Next the frame was cleaned and everything that may not be painted was taped off.
Next I painted the wheel hubs with some undercoating.
The loose chassis parts for the bed and bumpers were also cleaned an received an undercoating.
I also made a new bottom plate for the battery box and painted it with undercoating.
Next I degreased the chassis and started painting all the parts covered with undercoating and the parts from the underside that did not receive any paint the last time.
The battery box is looking fine.
As is the complete chassis with its fresh coat of paint.
And the small parts.
Now its waiting for the next week.
Next the frame was cleaned and everything that may not be painted was taped off.
Next I painted the wheel hubs with some undercoating.
The loose chassis parts for the bed and bumpers were also cleaned an received an undercoating.
I also made a new bottom plate for the battery box and painted it with undercoating.
Next I degreased the chassis and started painting all the parts covered with undercoating and the parts from the underside that did not receive any paint the last time.
The battery box is looking fine.
As is the complete chassis with its fresh coat of paint.
And the small parts.
Now its waiting for the next week.
Friday, March 17, 2017
Connecting rod
Today I started with the rebuild of the frame where the cabin was mounted to.
There was a wobble in it and was not high enough. It would hang up on my car hoist.
It's a difference of 10 cm .
The next thing I did was some cleaning around the chassis. All the dust from sanding the filler and the old sandpapers were removed.
And then I made the connection rod between the two seat rails. That rod was missing and is needed to move the seat back and forth.
The original lever for the operation had to be modified. Its not really visible in the picture but I make some more pictures on a later date. A means of retaining clip or so has to be fabricated to hold the rod in place.
I also tried to straighten the side of the truck bed But its difficult to get a picture of that.
Tomorrow more....
There was a wobble in it and was not high enough. It would hang up on my car hoist.
It's a difference of 10 cm .
The next thing I did was some cleaning around the chassis. All the dust from sanding the filler and the old sandpapers were removed.
And then I made the connection rod between the two seat rails. That rod was missing and is needed to move the seat back and forth.
The original lever for the operation had to be modified. Its not really visible in the picture but I make some more pictures on a later date. A means of retaining clip or so has to be fabricated to hold the rod in place.
I also tried to straighten the side of the truck bed But its difficult to get a picture of that.
Tomorrow more....
Thursday, March 16, 2017
More parts are ready.
Well we did continue the work today.
We applied some more filler to the doors of the cabin and also to the roof.
The last fender and the air duct were also covered with some more filler.
And then those parts were all sanded smooth.
The outside of the cabin is completely free of dents. They are all filled.
After some more sanding the air duct is ready
The last fender is readty.
So we started with the hood. The fitment of the hood ornament was checked .
And we then started with applying filler to the low spots.
Some sanding was done and then some more filler went on.
After some more sanding the hood is now ready.
All the filling and sanding for now was done on the outside of the panels. The visible side. The back side of these panels all need some sanding too. Not to the extend as up to now but...
So the next thing i did was make a stand for the truck bed in order to be able to paint it and do some sanding on it.
But that will be for tomorrow.
We applied some more filler to the doors of the cabin and also to the roof.
The last fender and the air duct were also covered with some more filler.
And then those parts were all sanded smooth.
The outside of the cabin is completely free of dents. They are all filled.
After some more sanding the air duct is ready
The last fender is readty.
So we started with the hood. The fitment of the hood ornament was checked .
And we then started with applying filler to the low spots.
Some sanding was done and then some more filler went on.
After some more sanding the hood is now ready.
All the filling and sanding for now was done on the outside of the panels. The visible side. The back side of these panels all need some sanding too. Not to the extend as up to now but...
So the next thing i did was make a stand for the truck bed in order to be able to paint it and do some sanding on it.
But that will be for tomorrow.
Wednesday, March 15, 2017
The first parts ready.
Today I continued the work where I ended yesterday. So I started with the 3 fenders.
After sanding them for the second time some more filler needed to be applied on some spots.
Next I sanded the cabin ones more and there to some more filler had to be applied.
And then back to the fenders. The first ones is now sanded with 180 grid paper and is ready for spray filler.
And after some more sanding the other 2 are ready too.
So those fenders are lade to the side and the last fender and the air duct for the radiator were laid on the table and filler was applied.
Then I went back to the cabin and sanded it some more and at 2 locations some more filler was needed.
Both places are located on the doors.
And that's it for today. Tomorrow we continue.
After sanding them for the second time some more filler needed to be applied on some spots.
Next I sanded the cabin ones more and there to some more filler had to be applied.
And then back to the fenders. The first ones is now sanded with 180 grid paper and is ready for spray filler.
And after some more sanding the other 2 are ready too.
So those fenders are lade to the side and the last fender and the air duct for the radiator were laid on the table and filler was applied.
Then I went back to the cabin and sanded it some more and at 2 locations some more filler was needed.
Both places are located on the doors.
And that's it for today. Tomorrow we continue.
Tuesday, March 14, 2017
Sanding has started.
We started the day with the removing of the hood, fenders and inner fenders and running boards.
All this work to be able to start the application of filler to the car.
And then the sanding can begin. The drivers side
The passenger side
And 3 of the four fenders. I had no more table space to work on.
After all the sanding an other coat of filler was applied. Both sides of the cab.
The rear of the cab.
And to the fenders. You notice that I covered almost the complete fender? This was done to speed up the sanding process.
Then the cabin was sanded ones more.
And an other coat of filler was applied. We are now using the 3 th pot of 2 kg. So tomorrow I will have to get some more to do all the rest.
Will the filler on the cab was curing I sanded one of the fenders. Most of the filler is sanded of but it is now almost ready for the fine filler. ( Last coat?).
That's it for today.
All this work to be able to start the application of filler to the car.
And then the sanding can begin. The drivers side
The passenger side
And 3 of the four fenders. I had no more table space to work on.
After all the sanding an other coat of filler was applied. Both sides of the cab.
The rear of the cab.
And to the fenders. You notice that I covered almost the complete fender? This was done to speed up the sanding process.
Then the cabin was sanded ones more.
And an other coat of filler was applied. We are now using the 3 th pot of 2 kg. So tomorrow I will have to get some more to do all the rest.
Will the filler on the cab was curing I sanded one of the fenders. Most of the filler is sanded of but it is now almost ready for the fine filler. ( Last coat?).
That's it for today.
Subscribe to:
Posts (Atom)


